Resin art has been trending for a while, and even those who don’t consider themselves creative are trying it.
From simple jewelry pieces to home utensils, there are unlimited possibilities for the things you can create.
Although resin art has only grown in popularity over the last few years, it has been around since the early 1900s.
If resin art has caught your eye and you’d like to give it a go, this article will teach you all you need to know about resin art.
What Is Resin Art?
Resin art is an out-of-the-ordinary painting style that involves using non-traditional materials.
All artists are creative, but those who use resin in their work take creativity to another level.

Resin art is not difficult, like all things new, it may take a bit of practice to get used to, but as long as you follow the directions you’ve been given, you should be fine.
Several types of resin include Silicone resins, alkyd resins, phenolic resins, polyester resins, and epoxy resins. Epoxy is the most popular, I will discuss it shortly.
What Do You Need For Resin Art For Beginners?
You will need several supplies to get started with resin art, and these include:
- hand cleaner
- rubbing alcohol
- paper towels
- a dust cover
- toothpicks
- a butane torch
- a plastic spreader
- a plastic stir stick
- goggles
- a respirator
- a plastic measuring cup
- a plastic container
- level
- plastic stands
- masking tape
- a plastic drop sheet
- an apron or old clothes
- disposable gloves
- and art resin
You will also need silicone or a plastic mold.
Silicone molds are preferred for smaller projects because of their flexibility, they return to their normal shape, and you can keep using them. But plastic molds tend to break.
What Is Epoxy?
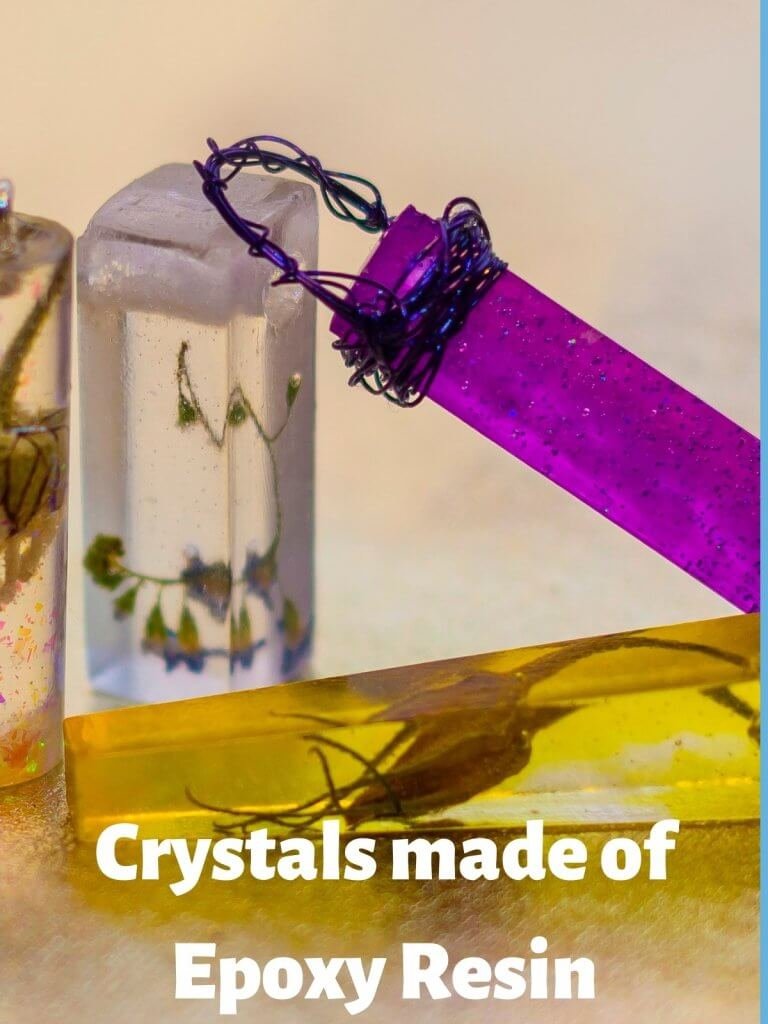
If you want a clear, high-gloss surface, you’ll need to use epoxy resin. It’s made out of resin and hardener.
Combining these elements causes a chemical reaction that hardens the resin and turns it into a solid plastic. Epoxy is used to make items such as ornaments, ashtrays, coasters, and jewelry.
How to work with epoxy?
To work with epoxy resin, you’ll need to make sure your surface is level and cover your area with something like silicone baking mats or parchment paper.
While your resin is curing, place a plastic container over it, so it doesn’t get infested with particles such as dust and flyaways.
Safety tips to work with epoxy
Epoxy is a strong chemical; therefore, you’ll need to work in a well-ventilated area so you’re not breathing it all in.
That means having windows and doors open or turning on a ceiling fan. You’ll need to protect your hands by wearing gloves, latex or nitrile will do.
Protect your clothes by wearing a PVC apron (they are the easiest to clean), or wear old clothes that you don’t mind ruining.
Protect your eyes by wearing a pair of goggles and a respirator mask to keep the fumes out of your lungs.

Resin Pouring For Beginners
Resin literally flies out of its container, so as a beginner, you should use a small cup because it will allow for better control.
White isn’t a dominant color, and when mixed with other colors, it quickly disappears, so unless you’re using white alone, always use more than you need.
How To Make Resin Art For Beginners?
Resin art is made in several ways, there are a variety of techniques such as molding, layering and straight coating.
Once you’ve made your design, you can color it using resin dye. Here are some tips on how to make resin art.
How To Make Resin Art With Molds
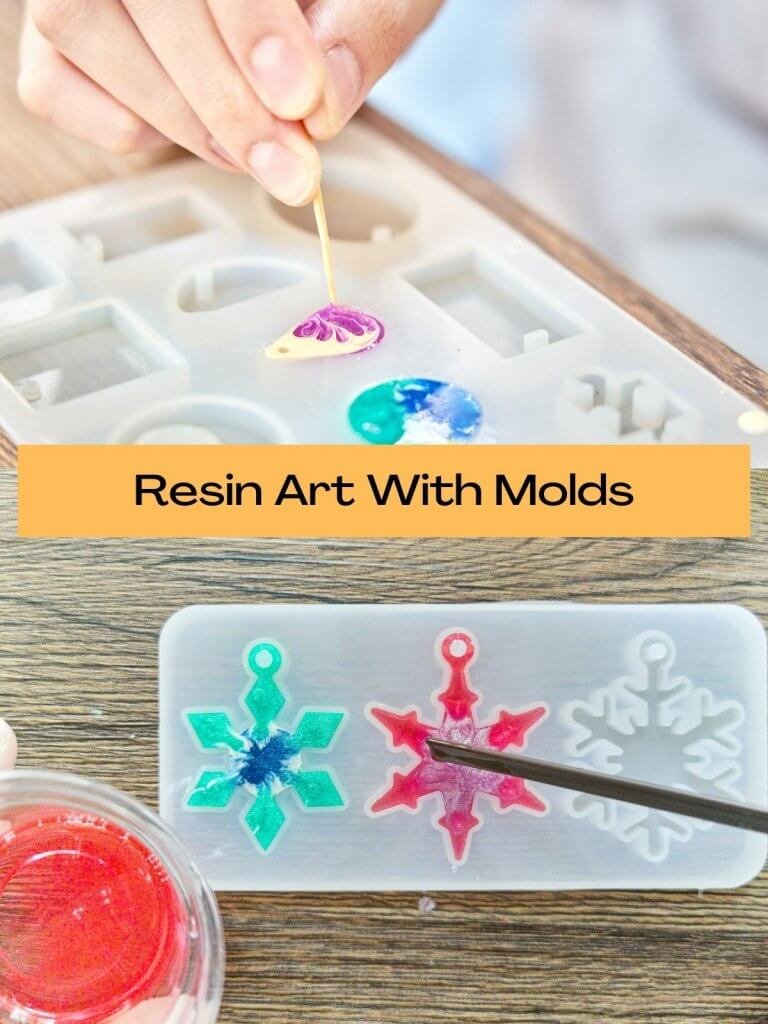
To get started, you will need disposable gloves, a disposable plastic cup, a popsicle stick, a syringe, resin, and molds of your choice. You will then need to follow the steps below:
Step 1
Wash the silicone molds to remove any dust or debris. Leave the molds out on a napkin to air dry. Arrange newspaper over your work surface.
Step 2
Put your gloves on and use a syringe to measure the resin (follow the manufacturer’s instructions for measuring). Next, use a popsicle to stir the mixture. If you use colors or dyes, follow the manufacturer’s instructions to add them.
Step 3
Arrange the molds on your work surface and scoop the resin mixture into it with the popsicle stick. It takes around four hours to set halfway, you can add more layers after this until you get your desired thickness.
Considering a new hobby? Take a look at one of our Beginner Guides and start your new hobby today!
Step 4
Resin is very messy, so it’s best to soak everything overnight, or you’ll spend hours scrubbing.
Step 5
Once the resin has thoroughly dried, pop it out of the mold. Don’t use a sharp object to pry it out or you risk scratching it.
Resin Casting For Beginners
Resin casting involves pouring epoxy resin into a mold and waiting for it to harden.
Depending on the size of the project, it generally takes between 12-24 hours before the molds are hard enough to move, and it takes a few days to cure fully.
If you want to speed up the process, use a UV resin that will cure a few minutes after exposure to UV light.

Colors and dye
There are several options when it comes to coloring resin, and these include the following:
Resin Dye
Resin dyes come in opaque or transparent powders and pigments. With an opaque pigment, little to no light will shine through the resin. With a transparent pigment, light can pass through the casting.
Mica Resin Powder
The powder is mixed directly into the resin, giving it a deep and consistent color.
Eye Shadow
You’re probably just as shocked as I was when I found out you could use makeup to color resin. But it works extremely well. Eye shadow works in the same way as the mica powder. Scrape the eye shadow out, crush it into a powder and add it to the resin.
Acrylic Paint
Although you can use acrylic paint to dye resin, it’s tricky, so I would advise that you return to this method once you’re more experienced. Nevertheless, acrylic paint is highly pigmented and will give you the deep rich color you’re looking for.
Alcohol Ink
If you’re looking for a deep pigment, use alcohol ink. You can either drop the color onto the surface of your work or mix it into the resin.
Color Shift Pigments
Color shift pigments are awesome because it will change color depending on the angle you’re looking at the item. If you’re looking for a dynamic effect, color shift pigment is your best choice.
Glitter
Glitter is a great way to color resin, make your items sparkle, and give them the wow factor.
UV Resin Dye
UV resin dyes give you a choice of 13 colors. They are great for coloring small items such as jewelry. UV resin dyes are compatible with all resins.
Different Resin Art Techniques
You will need to use different techniques to vary the effects of your resin art. These include the following:
Layering Resin
Layering involves adding several layers of resin over an object until you achieve your desired thickness. As each layer dries, add another layer.
Pearl Powder
If you’ve seen a pearl, you can get an idea of what your finished resin piece will look like with a pearl powder color added.
Straight Coating
Straight coating involves using the resin to paint or pour over something else. You can use this technique on items such as metal, furniture, dishes, and glassware.
Molding Resin
Molding is the most popular form of resin art. With molds, you can make a variety of 3D creations.
Free Pouring
Instead of using a mold, you pour the resin over an item—for example, spoons and cutting boards.
Resin Art On Wood
Resin art on wood involves coating it with resin in the design and style of your choice to give it a glossy finish.
DIY Resin Art Step By Step Guide
If you want to get started with resin art, below are the steps you’ll need to follow. This tutorial is focused on wood:
#1 Get The Wood Ready
Cut the wood to your desired size and get rid of any rough edges by sanding them down. You’ll also want to make the edges slightly rounded.
#2 Prime The Wood
To get rid of the wood texture, spray paint the wood with a primer. This process makes the colors more vibrant.
#3 Plan The Colors
The colors you use are up to you. You will need to consider things like the look you want to create. If you’ll be hanging the picture up in your house or giving it to someone as a gift, will the color match the decor?
#4 Prepare The Cups and Canvas
Use one cup per color, and sit a popsicle stick into the cups for storing. I know I’m stating the obvious, but make sure you use one stick per color. You’ll be surprised at how many people get this wrong.
#5 Mix The Resin
To mix the resin:
- Follow the manufacturer’s instructions. As mentioned, the typical ratio is 1:1.
- Stir for a minimum of three minutes, I’ve found that it takes seven minutes to mix it all up properly.
- Make sure you scrape around the sides and the bottom of the cup to combine all the ingredients properly.
#6 Pour The Resin Into Cups
Pour the resin into the cups and then add the acrylic paint. You’ll know when it’s ready because the color will be solid. But don’t dump everything in at once, add the color slowly.
#7 Pour The Resin Onto The Wood
Carefully pour the resin onto the wood in the design that you want. However, don’t get too excited about what it looks like because once it’s set, it will look slightly different.
#8 Get The Gun Ready
Preheat the gun, so it’s ready as soon as you’ve completed your work.
#9 Protective Covering
You can use a cardboard box, a PVC, or a plastic covering to protect your work while it dries.
It should rest above and not on your work, leave the covering on for a minimum of eight hours. Do not touch it until it has completely dried.
#10 Show Your Resin Art To The World
Removing the cover is exciting and nerve-wracking all at the same time because you’re hoping it turns out the way you want, but you’re not sure.
Once you’ve taken the cover off and you’re happy with your work, hang it up for all to see.
Safety Tips For Working With Resin Epoxy
Resin is fun to work with, and it can be even more fun if you know a few tips, hacks, and tricks to ensure your art-making project runs smoothly. Here are eight tips to get you started:
#1 Getting Resin Off Your Hands
Although wearing gloves should protect your hands, sometimes things don’t work out according to plan, and you end up covered in resin.
Some people use strong chemicals to get it off, but the risk is that this can cause skin damage. The good news is that natural ingredients are just as effective.
Here’s what you’ll need to do. Stand over a sink, scoop out one tablespoon of baking powder, and pour it into your hand.
Next, pour one tablespoon of dish liquid into the same hand and use this mixture to wash your hands. If you don’t get everything off the first time, repeat until all the resin is off.
#2 How To Use Leftover Resin?
There’s no need to waste your leftover resin, but you’ll need to be prepared for this.
Arrange extra silicone molds, and as soon as you’ve finished pouring your resin, pour the leftover resin into the molds.
#3 Don’t Let Mistakes Discourage You
Sometimes, you’re not going to get the effect you were hoping for, but that’s fine.
Instead of being too rigid, allow art to do what art does best and take its own form. Basically, go with the flow, and whatever happens, happens.
#4 How To Smash Flat Marbles
A common complaint in the resin art world is how difficult it is to smash flat marbles and compact glass in general. They make really pretty decorative pieces but smashing them is a problem.
Most people attempt to do this by placing a tea cloth over the marbles and smashing them with a hammer. You can make this process a lot easier by heating the marbles.
So here’s what to do…I might sound like a broken record, but first off, ensure your eyes and hands are protected. The next step is to heat the marbles.
You can either place them into a pot of boiling water or a heated frying pan and cover them with a lid. Get a bowl of ice water ready while the marbles are heating.
Leave them to heat for around five minutes. Once they are ready, spoon out the marbles and place them into the bowl of ice water.
Lay out a tea cloth, remove the marbles from the bowl and place them on the tea cloth.
The marbles should have tiny cracks in them, which makes them easier to smash. You can then place another tea cloth over the top and use a hammer to break up the marbles.
#5 Choose The Right Resin
The resin you use will depend on the project, so knowing which resin to use is important. There are two main types of resin, casting and coating resins.
Casting resins are thinner and don’t hold as many bubbles, which is great, but because of their watery consistency, they are best suited to molds.
Coating resins are also referred to as doming resins. It’s a thicker consistency and gives a glossy finish.
Coating resin is too thick to use in molds because when bubbles form, they stay. Coating resin is better suited for tiles, countertops, artwork, tumblers, jewelry, etc.
#6 Journal Your Process
One of the most frustrating things for artists is to create something spectacular and forgetting how to recreate it.
To avoid this, journal your process, write down the colors and techniques used, and anything else used to create your masterpiece.
You can also take a picture of the finished product and stick it in your journal.
#7 Make A To Do List
Instead of winging it, write a plan of how you intend to make your crafts. As you work through the list, tick off all the completed tasks. This strategy is especially helpful for newbies.
#8 Expect The Unexpected
Resin art is unpredictable, and anything can happen at your workstation, so don’t put time on it and don’t make any plans for the day. Just go with the flow, and whatever happens, happens.
10 Beginner Tips For Making Resin Art & Mistakes NOT To Make
The easiest way to learn a lesson is to take the advice of those who have already made the mistakes you’re trying to avoid. So take it from a seasoned resin artist forced to learn the hard way. You want to avoid the following:
- Excessive torching.
- Allowing particles into cured resin.
- Not pouring fast enough are just a few of the blunders you want to avoid.
Keep reading to find out the mistakes you’ll definitely want to avoid as a newbie.
#1 Read The Instructions
Reading the instructions may seem like a no-brainer, but some people either don’t read the instructions or don’t read them properly and end up making costly mistakes.
I was one of those people, and I’ve spoken to many others who have done the same.
So, whatever you’re using, even if you think you know how to use it because you’ve seen someone else do it, you saw it on YouTube, or whatever the case may be, make sure you read the manufacturer’s instructions thoroughly before proceeding.
#2 Excessive Torching
When the flame is held in one spot for too long, or if the flame and the surface are too close together, you will over-torch your resin. Over-torching can cause ripples, dimples, and premature yellowing of the resin.
#2 Allowing Particles Into Cured Resin
Before starting your work:
- Make sure all the surfaces and anything else that generates dust are wiped down.
- Once the project is complete, place a plastic container or a cardboard box over the top.
- Don’t leave your work alone for one second, do this as soon as it’s done.
#3 Not Pouring The Resin Fast Enough
When the chemical reaction starts after mixing the resin, the mixture will warm up and keep warming up.
If the mixture sits in the cup for too long, it will cure too quickly in the cup, and you won’t be able to pour it out.
To prevent this, make sure all your tools are ready, so you can pour as soon as you’ve mixed the resin.
#4 Excessive Colorant
Whether using a powder or a liquid colorant, don’t overdo it, or the resin won’t cure properly.
It’s recommended that you use six percent of the hardener and resin volume.
In general, you only need a little bit of colorant to get the desired effect, so use a small amount to begin with. Then, you can add more if you need it.
#5 Not Prepping Your Artwork
Before you begin, prep your artwork by ensuring your piece is free from dust and dry. Place a piece of cardboard at the back of a large stretched canvas for extra support.
The cardboard will stop the canvas from going floppy. Mount photos or prints so that they’re even on their substrate. Spray glue will give an even coverage, and going over the top with a rolling brayer will ensure there are no air pockets and that it bonds properly.
Use a sealant for anything that might absorb or bleed wet resin, such as soft paper, or charcoal. To prevent your work from sticking to the surface, prop it up with plastic stands.
A level will keep your piece horizontal, allowing you to apply an even resin coat. If the sides of your work need resin, use painter’s tape to tape the bottom off, so there’s no dripping.
Arrange drop cloths on the floor to keep your workspace free from dust or debris, and put a plastic sheet over your workspace. And finally, stay organized by having all your tools ready before getting started.
#6 Failure To Test
Start with a test before investing all your time and energy into the real thing because the resin can be unpredictable.
For example, the colors can come out darker than expected, and fabric, matte photographs, and soft porous paper may absorb the resin.
#7 Temperature Is Not High Enough
Thick resin means it’s too cold. Make sure it’s above room temperature. You can achieve this by putting the bottles into a water bath.
Also, your resin room should remain between 72-78 degrees F for the first twenty-four hours of the cure.
#8 Not Mixing Properly
You need to mix for a minimum of three minutes because if the mixture hasn’t blended properly, it won’t set off the right chemical reaction, and the mixture won’t cure. Additionally, don’t whisk the mixture, stir it slowly.
#9 Inaccurate Measurements
You will need to use equal amounts of hardener and resin. All materials come with instructions, so follow them exactly as they’re written.
Even if you’re certain you know what a measurement looks like, don’t measure by eye, always use a measuring jug.
How to avoid bubbles in your resin creation?
After spending all your time and energy on a project, the last thing you need is for it to come out covered in bubbles. The good news is that you can avoid it by following these steps:
#1 The Temperature
Your workspace should be between 72-78 degrees F—the closer to 78 degrees, the better.
#2 Warm Water
If the hardener and the resin are cool, place the bottles in a bucket of warm water, this will reduce the working time of the mixture to 30 minutes.
#3 The Pouring Process
When pouring the resin and hardener, slowly pour them down the side of the measuring cup. Making sure what you’re pouring the liquids out of is touching the measuring cup and not high above it.
#4 Resin Ratio
Make sure you’re using a 1:1 ratio of hardener to resin. If not, even it out, or it will cause bubbles.
#5 Mixing The Resin
Mix the resin thoroughly but smoothly and consistently to prevent air bubbles from forming. Press whatever you’re using to mix the resin to the bottom of the cup while mixing.
#6 Remove Bubbles
Once the resin and hardener have been thoroughly mixed and poured into the mold, let it sit for two minutes, and then remove any visible bubbles using a straw, a toothpick, a lighter, a kitchen torch, or an artist’s torch.
Over the next couple of hours, keep checking to make sure bubbles are not forming. If they are, use the same method to get rid of them.
#7 Check For Milkyness/Cloudiness
If your resin has a milky or a cloudy look, it indicates that the temperature is too low.
10 Resin Art Project Ideas
You’ll be amazed at the amount of things you can make with resin. These include drink coasters, keychains, and dominos.
And no, you don’t need to have years of practice to successfully make these items because there are enough instructional videos online by professionals who will give you step-by-step instructions.
So, if you’re unsure what to make with your next resin art project, here are ten ideas to get you started.
#1 Drink Coasters
Drink coasters or beer mats are a great way to protect your tables when you’ve got a cold beer or a hot mug of tea.
#2 Keychains
You’ll never lose your keys again once you know how to make your own keychains.
#3 Dominos
Are you a dominos player? If not, maybe you know someone who is. Whether you make them for yourself or a loved one, you can’t go wrong with a unique set of dominos.
#4 Cutting Board
No more plain-looking cutting boards for you! You can get extra creative and make the cutting board you’ve never been able to find in the stores with resin.
#5 Bookmarks
If you’re a reader who hates folding pages but often finds yourself at a loss for how to mark your spot, not to worry, you’ll never lose track of your reading again because you can make your own bookmarks out of resin.
#6 Trays
Food trays are important, you need them to carry food and drinks from one part of a house to another. But they’re the one item that people don’t seem to have. Even if you’ve got trays in your house, make some for the loved ones you know don’t have them.
#7 Jewelry
Do you love wearing jewelry but can’t seem to find any that matches your personal style? Then, start making your own, and you’ll have the right earrings, bracelets, and necklaces for every outfit. They are the perfect gifts for friends and family members.
#8 Dice
Gone are the days when you open a board game and realize you’ve lost the dice, but it’s too late to go out and buy some more. Dice are one of the many amazing things you can make from resin. You’ll always have spare dice if you know how to make your own.
#9 Wooden Spoons
Are you tired of looking at the same old wooden spoons in your kitchen cabinet? Spruce them up a bit by making resin handles for them. I’m sure your mother or grandmother would love her own personalized wooden spoon.
#10 Notebook Covers
If you want to add an authentic touch to your notebook covers, personalize them with resin. You can either make them for yourself, or they’ll make an awesome gift for friends, family members, or co-workers.
Final Thought
One of the reasons why resin art is so fun is because of the number of things you can make with it.
Once you’ve finished with one project, you can move straight on to the next.
Plus, you’ll save some cash making personalized gifts for loved ones, whether for a birthday, wedding, or Christmas.


