So you want to get into Copic art markers? Well, this beginner’s guide is a great place to start! You’ve probably drawn with Crayola markers before but now it’s time to join the big leagues.
If art markers are brand new for you, you might want to check out my complete beginner’s guide to art markers.
For inspiration, try checking out this list of 12 amazing Copic artists to follow on Instagram.
Introduction
Copic is a Japanese brand of art markers (and other art supplies) whose popularity has rocketed among artists in the United States for the past few years.
Copic is made by a Japanese company called Too but is distributed by Imagination International and Notions Marketing in the US and Canada.
These markers were developed with the Japanese manga industry in mind but their popularity quickly caught on for artists in all different styles of art, design, and crafts.
Copic marker features
Copic markers are known as being one of the highest quality alcohol-based markers available.
These markers feature a permanent, non-toxic, acid-free ink that produces pretty smooth and easy-to-blend colors.
These are also available in 358 different colors and 4 different types of markers–Original, Sketch, Ciao, Wide, and Comic.
Another great thing about Copic markers is that the ink is refillable and can even be mixed to create unique colors.
In addition, the markers’ nibs are also replaceable should they become used or damaged. Even with all these great features, Copic guarantees a 3-year shelf-life for their markers.

Copic markers have a pretty hefty price tag, with markers ranging from $3 to $9 depending on how and where you purchase them.
Many consider the price worth it due to Copic’s high quality and ability to refill ink and replace nibs. Before investing in an entire set, it’s always advisable that you try them out.
Thankfully, Copic markers are also sold individually so you can buy 1 or 2 colors to try out first. You might find these individual packs locked up behind some fancy gates at your local crafts store due to the high price and quality.
Copic markers also have their own color labeling system that is extremely useful to know as an artist.
Copic also sells an airbrush system that you can use with their markers to produce an airbrush-like effect for your artwork. No worries, though. We’ll cover all of this in this beginner’s guide.
What are the Different TYPES OF Copic Markers?
COPIC Original
As the name would suggest, the Copic Original marker is considered their original. It’s available as a double-sided square barrel marker with a broad tip on one side and a fine tip on the other.
It holds the most ink out of the five types of markers and has nine different nib options.
These are typically used for basic crafts rather than professional high-quality artwork. They’re also available in 214 colors and compatible with the Copic airbrushing system.

COPIC Sketch
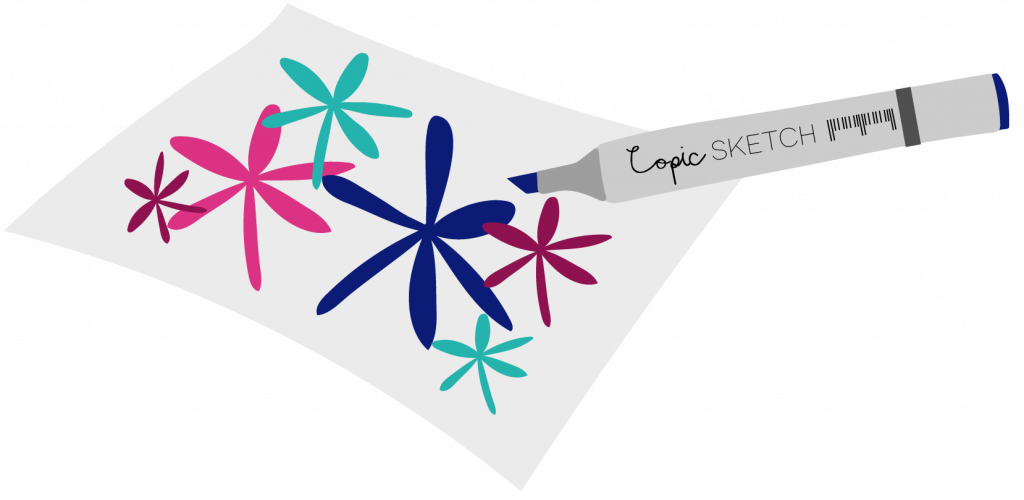
Copic Sketch is the ideal marker for high-quality artwork and is available double-sided, with a broad tip on one side and a brush tip on the other.
The tips on these oval-barreled markers can also be changed, but only one other nib options are available.
Copic Sketch markers are available in all 358 colors and is typically the ideal choice for professional artists. Like the Copic Original, these markers can also be used by Copic’s airbrushing system.

Copic Ciao
Copic Ciao is similar to the Copic Sketch markers but is cheaper and of lesser quality. Unlike the other markers, they are cylindrical in shape and do not have their color name printed on the caps.
They’re also only available in 156 colors. The Copic Ciao markers are also double-sided, with a broad chisel nib on one side and a brush on the other. Lastly, the cap on these guys is child-safe with little air holes.

Copic Wide
Copic Wide has an extremely wide tip, as you could probably predict from the name –3/4″ inch to be exact.
They’re ideal if you need to color a larger surface area but are only available in 36 different colors.
They aren’t double-sided, but the wide nib can be changed out for one other nib option.

Copic Color Theory
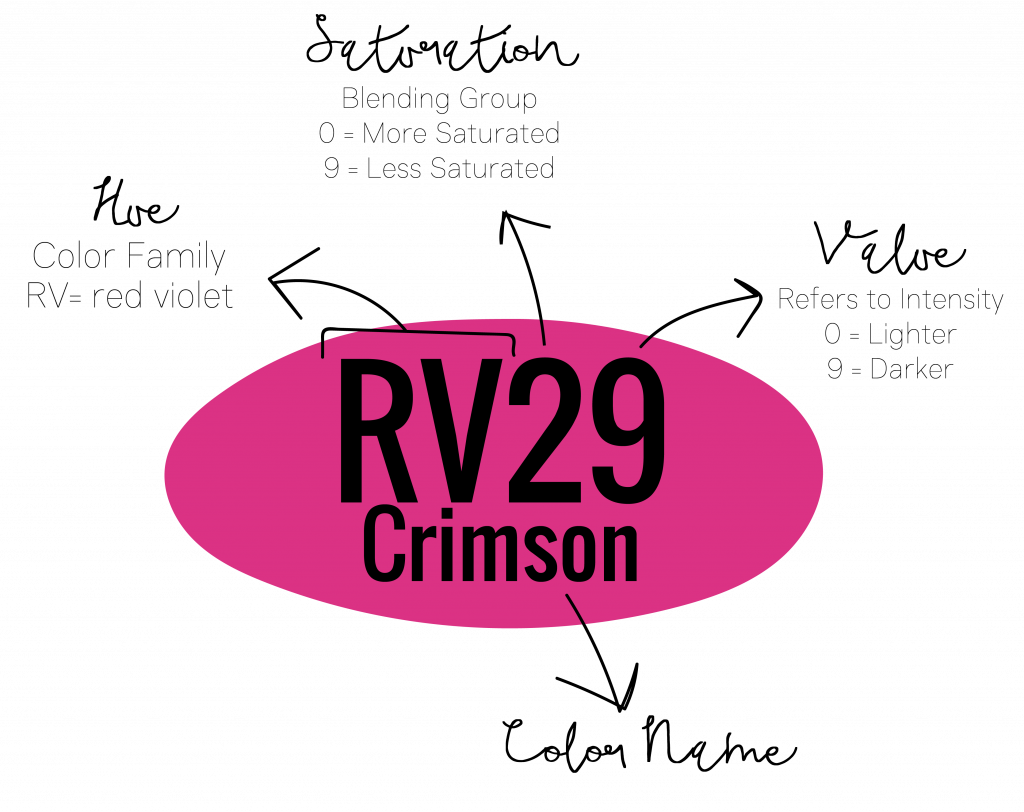
Copic markers can be identified by their color code, a combination of letters or numbers that can be found printed on both ends of the marker.
The letters identify the color family, the first digit represents the blending group, and the last digit refers to the intensity of the color.
To determine if a color will blend easily with another, you want to match the color code as close as possible.
For a complete chart of all 358 colors available, check out this chart from Copic.

Color Family
The letters of the color code identify the color family. Markers with the same letters will be in the same color family. The chart below outlines what color family the letters represent.
If you check out this from Copic, you’ll see each family’s complete list of colors. The colors shown below are by no means an accurate representation since the fluorescent family also has yellow, green, violet, etc.
Copic also has 4 gray families, with Cool Gray being the coolest family, followed by Neutral Gray, Toner Gray and Warm Gray.
Copic Marker Family
Blending Group
The first digit of the color code indicates the level of saturation. The numbers range from 0 to 9 where 0 indicates the highest level of saturated color available and 9 indicates a desaturated color.
Matching this number for different Copic markers will keep the blending group the same.
specific value
The last number refers to the intensity or specific value of the color. The numbers also range from 0 to 9 where 0 indicates the lightest color and 9 indicates the darkest color available.
If you desire highlights, choose a color where the last numbers range from 0-4. If you’re looking for mid-tones, select colors where the last digits are 4, 5, or 6.
For shadows, you’ll want to select colors where the last digits are 7, 8 or 9. For the best results when choosing colors to blend well, select ones where the last digit is within 2-3 digit range.
COPIC MARKER COLORING TIPS
- Before you color on any paper, you should test the markers on it to see if you’ll get any bleeding. Make sure that you have a few more layers of paper underneath to see how severe the bleed might be.
- If you are using a variety of mediums on your artwork, make sure all other artwork is completely dry before coloring with the markers. If you are laying down ink lines before coloring, you definitely want to avoid smudging these lines.
- Make sure you use the lightest colors first and gradually work towards your darker shadows. If you color with darker colors first, it will be difficult to fix mistakes.
- To blend, first color the desired area evenly with the lighter color. Next, you want to color the desired area with a darker color. Use the ligther color to blend the area where the two colors meet by applying to color over this area multiple times until the colors blend together.
- You can also blend color by treating the marker ink sort of like watercolor paints. Use the marker to color on a piece of plastic. The ink shouldn’t absorb into the plastic and will leave a small puddle. Take the marker of the second color you want to blend it with and touch the nib to this puddle. It will pick up a small amount of the color on the nib’s tip. Use the marker like a paintbrush and you’ll see the blended color result on the paper.

COLORLESS BLENDER
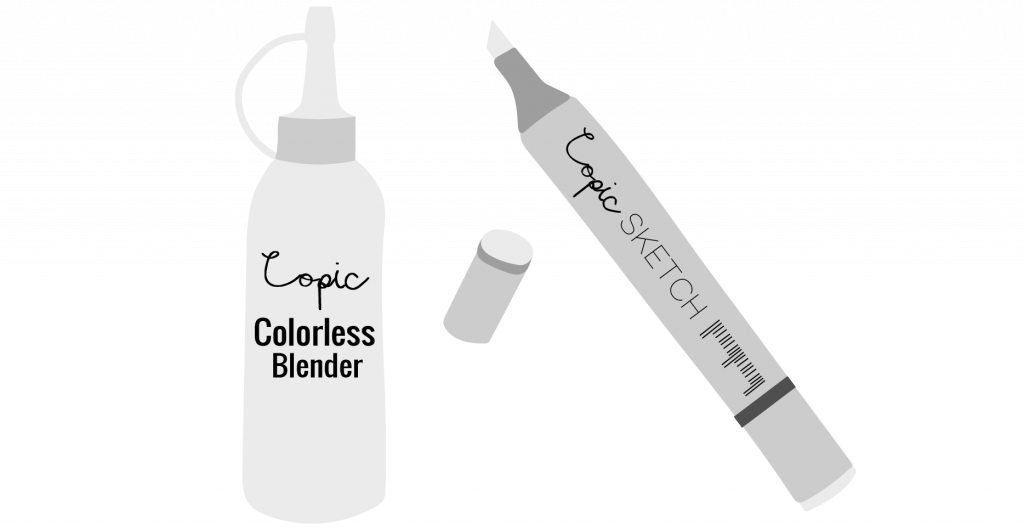
A colorless blender has the same ink that’s found in all other Copic markers but without the color.
A colorless blender can also be used to help blend. Saturate your desired area with the colorless blender first.
Add the color you want over that layer while it’s still damp. This will result in a much smoother blending effect due to the colorless blender ink moving the color on paper.
Colorless blenders are great for adding highlights when you need to add lighter colors to a darker area.
Although it isn’t recommended to use darker colors before light, you may find that you want to add highlights to a certain area that you have already colored.
Colorless blenders can also be used to fade an area. Make sure you try out the colorless blenders and the effects it can have on a particular color by testing it out on a different sheet of paper.
You can also use colorless blenders if you color outside of the desired space by using the marker to push the color back into the right area. If you repeat this step, the color will appear lighter and lighter.
Listed below are all the great things you can do with a colorless blender: Check this guide out for detailed info on how to get all these results.
- Adding highlights
- Fading to white
- Coloring transparent objects
- Pre-soaking paper
- Fixing mistakes
- Adding texture & patterns
- Blending colors together
- Muting colors
- Cleaning up edges

Replacing Nibs on COPIC MARKERS
As mentioned previously, Copic markers have this neat feature of having replaceable nibs.
Whenever they become too worn out or damaged, you can buy a nibs to replace them.
You can also change out nibs if you are looking for a different stroke line or weight when applying color. Not all of types of nibs are available for each type of marker.
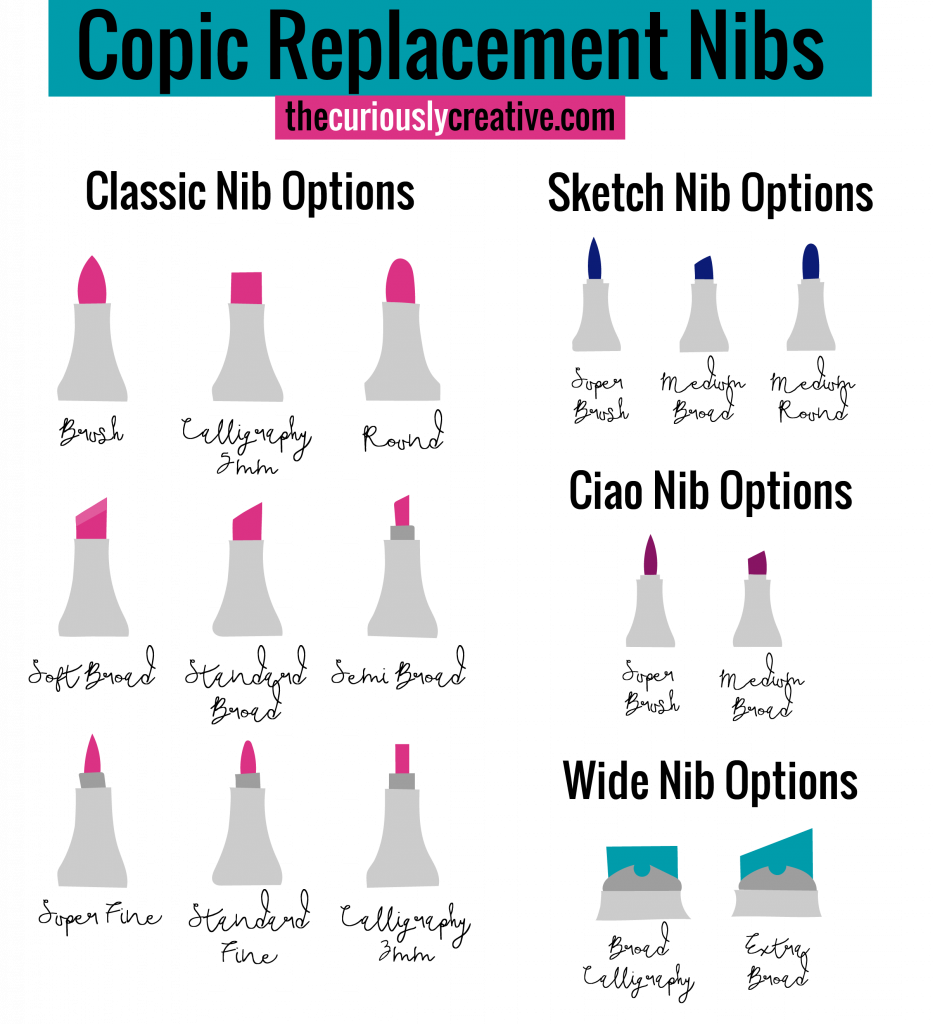
The Copic Classic marker has the most options with 9 different nibs –brush, calligraphy (3mm and 5mm), round, soft broad, standard broad, semi broad, super fine and standard fine.
The Copic Sketch marker has 3 options: super brush, medium broad, and medium round.
The Copic Ciao have the super brush and medium broad nibs as options. The Copic Wide also has 2 options –broad calligraphy and extra broad.
To replace them, use a tweezer to gently pull out the existing nib by gripping firmly on the base.
Use the tweezer to insert a new nib. The ink will start flowing through the nib by itself.
Copic sells special tweezers with small teeth on end to help grip the nibs but a good sturdy flat tweezer should do the trick.

Refilling INK IN Copic markers
All Copic markers can be refilled. Copic sells 25 milliliters (mL) bottles of “Various Ink” in all 358 of their colors.
How long each bottle of ink will last will depend on the type of marker you are refilling.
For one bottle of ink, the Classic markers can be refilled 9 times, Sketch refilled 12 times, Ciao refilled 15 times, and Wide refilled 7 times.
Not only can they be refilled, but you can also create your own custom colors by mixing inks.
They even sell empty markers to allow for you to do this without using your existing markers.
Copic markers can be refilled using 2 different methods, the booster method, and the drip method.

Booster Method
- For Copic Classic markers, attach the booster needle to the ink bottle. Insert the needle into the marker’s nib and squeeze in 2-3 milliliters (mL) of ink.
- For the Copic Sketch, Ciao, or Wide markers, you’ll need to remove the nib and drip the ink directly into the marker body using the booster needle.
- For Copic Wide, you’ll need to drip up to 5 mL of ink into the nib while holding the markers at a 45-degree angle. The ink will sit in the little circular notch until it absorbs through.
Drip Method
The drip method can be used for all marker types. Using the dropper on the bottle, drip ink on the nib while holding the angle of the marker. Let the drop be absorbed through the nib before adding the next drop.
For Copic Wide markers, you’ll need to drip up to 5 mL of ink into the nib while holding the markers at a 45-degree angle. The ink will sit in the little circular notch until it absorbs through.
USING THE COPIC AIRBRUSHING SYSTEM
Another great feature of Copic markers is that they can also be used with an airbrush system.
The Copic Airbrush System (ABS) is compatible with only 2 marker types –Copic Classic and Copic Sketch. You can use your markers to color on various surfaces without worrying about causing any damage to your nibs.
They’re REALLY easy to use and switch colors too! You just snap your desired marker into the ABS and you’re good to go!
Copic has 3 different types of airbrushing systems available, all of which are lightweight and portable.
The airbrushing system you decide to buy will ultimately depend on what you’re trying to do with it.
Since the Copic Airbrushing System is for more advanced users, I won’t cover it here. However, Copic has a great brochure you should check out if you want more info.

Choosing the Right Paper
Like any art medium, Copic markers will work great on some papers but not so well on others.
Copic makers will feather pretty easily on uncoated paper while coated papers will vary.
On glossy paper, you’ll have to use darker colors since colors don’t absorb as easily on this coated paper like this. Layers are a little more difficult to apply and stick.
On vellum or tracing papers, the paper does not absorb the ink. This allows you to erase the artwork if needed. This paper is also transparent so you can utilize this feature by coloring on both sides to create your artwork.
For general illustration, you should work with uncoated paper-like stamping illustration, mange illustration, or natural white sketchbook.
Since Copics were designed for the Japanese manga industry in mind, you might want first to consider manga illustration paper.
The markers won’t bleed on thicker illustration paper and appear pretty smooth. On thinner paper, you might find the color to bleed through.
You should use thick, opaque card stock with an uncoated, smooth surface for paper crafting.
Usually, only card stock that is 120lb weight will not bleed out. If you are using a lighter-weight paper, you should work with another paper underneath.
For black and white comic art, use something with a smooth surface like manga manuscript paper.
Use an alcohol marker pad, vellum, or tracing paper for product design and architectural illustrations.
Alcohol marker pad paper is pretty thin and coated. It’s really good for tracing and it typically doesn’t bleed through.
You should try out different papers to see what works for you best because it will depend on the amount of layering and blending you desire.
Test your paper before you use it for artwork to determine if it’s right for you.
Copic markers can be intimidating if you’re a beginner but once you get use to it, you can REALLY produce some great art!
If you need inspiration, try checking out this list of 12 amazing Copic marker artists to follow on Instagram.


